Showing posts with label Favorite Products. Show all posts

Friday, March 14, 2014

Traditional Smokey Eye Tutorial and Brushes

Hello! After this post a friend of mine asked me to do a tutorial on a traditional smokey eye look. Then, just yesterday, another friend asked me on Facebook for the same thing! So, here we are. Let's get started!

First of all, I took individual pics of my personal brushes and the products I used and then I got a new phone which deleted all of my high class iPhone pics of brushes and products. So, instead I've found pictures of the exact ones I used online. However, I used products that you can easily find dupes of as well as use your own versions.

So to start off, when working with dark colors, and especially when doing a smokey look like this, I definitely suggest doing your eye makeup before anything else. That way, if you experience fallout with your products or smudge something on your cheek accidentally, you can easily fix it without messing anything else up.

So, start out with a bare face like so. And don't be scared.

The bare face!

Next pull up your hair and prime your eyes. First, I prime with a liquid/tube primer. I typically reach for the ELF cosmetics Mineral Eyeshadow Primer (because it's affordable and works! $3!) But Nars and Urban Decay both make great options.
Elf Mineral Eyeshadow Primer

After patting that onto my lid, I go in with an eyeshadow base. If you don't have oily lids you can skip the first step and start here. The purpose of a base is that your shadow will stick better to your lid without creasing, you'll see brighter more true to color pigmentation and you'll also cancel out any discoloration or veins on your eyelids. My very favorite is Painterly Paint Pot by Mac, but if you're looking for shimmer, Maybelline makes a great version as well for a fraction of the cost. Unfortunately, Maybelline doesn't make a matte color and that's what I love about Painterly. I apply this with my finger.

Here is the Paint Pot I used:
 
Painterly Paint Pot by MAC

And here is the Maybelline version. My favorite of the Maybelline version is in the color Bad to the Bronze or Barely Branded. Here are pictures of both of those. Remember, the Maybelline version is not matte, and has quite a bit of sparkle. I've also noticed it's harder to blend out, but it is a fraction of the cost.
Barely Branded
Bad to the Bronze
Next, you're going to want to lay down a transition shade. This is so that when you're finished with the darkest part of the eye (in this case a color as unforgiving as black) you have a lighter color that pulls your look together before it reaches the brow bone. You don't want black all the way from your lash line to your brow, but you also don't want a harsh change from black to highlight. The colors that I use to transition are Foxy and Naked2 in the Urban Decay Naked Basics Palette. (You could use only this palette and create a gorgeous smokey eye, but I decided to go all out.) I use a Sedona Lace EB 13 Brush for this. It's a fluffy brush but more dense than some. It lays down a great transition shade. It is a synthetic brush, so it transfers color well without absorbing the pigment into the bristles.

Use windshield wiper motions with your transition shade, but then make little circles in the outer "V" of your eye to really buff out your transition color.
This is the synthetic EB 13 brush by Sedona Lace.
I used the colors Foxy and Naked 2 to lay down my transition shade.

You'll take a blending brush and use windshield wiper motions to go across the crease and just up onto the brow bone. On the outer "v" of your eye, go ahead and make little circles with your brush to buff out the color, but mostly focus on a back and forth motion.


After that, you're going to take a denser, smaller brush and go in with your darker color. In this case we are using black. I like to start about 3/4 of the way toward my outer "v", create a bit of a line from there to the end of my lash line, and then go up and under my brow bone. Don't worry too much about carving out the crease at this point. Just get your product down. For this black color, I used "Crave" from the Naked Basics Palette. The brush is a dense brush by Elf Cosmetics called the contour brush.


Elf Contour Eye Brush

The color "Crave" is used on the eye look above.
Now, get yourself a fluffy (fluffier than the brush you used for your transition shade) blending brush and...BLEND, BLEND, BLEND. Be careful not to take the color too far out of your eyelid of you'll end up with the dreaded raccoon eyes, and don't take it too far up past your transition color. Use small circles with your brush and just blend. When you think you've blended enough, take a step back, look in the mirror and blend some more. And then blend some more. This is why we don't have the rest of our makeup on yet. You might see that your shadow will go too far out onto your temples (try to avoid this but I'll tell you how to fix it later) or you might see that it's falling down on your cheeks.

I use this blending brush by Mirabella. It's fluffy and sturdy and I just love it.

After you've blended it out, you can see that it's much less harsh and easier to take in.


Next, I like to go in with a bit of grey under the lash line and then carve that same grey right into my crease. I do this with the Real Techniques Details brush. I use that same brush to smudge and smoke out the lower lash line, and then go in with that fluffy blending brush from earlier (Mirabella) to blend out the crease. Really push that fluffy brush into your crease to give some definition to the "all black" thing going on. Yes, I know it doesn't look presentable yet but that's the thing about a smokey eye. It's not going to look good until you're completely finished.


Next, I work on the lid. I went for a vanilla/cream colored pigment by NYX, though you can stick with a white color and have a similar and probably even more traditional look. I take this on any old eyeshadow brush and I always spray it with Mac Fix+ when using a pigment. It gives a foiled look and creates lots of "stay" for your colors. It's a product I definitely recommend but you can really use any makeup spray for this. Pat (don't spread or smear or blend), I repeat PAT the color onto the lid until you have that half-moon shaped look on your lid. Take a tiny bit down onto the outer lower lash line and inner corner.

Mac Fix+. You can use this by spraying it directly on your brush before dipping it into a pigment or shadow, and it can also be used by spraying directly on your face to add a dewy finish. I wouldn't recommend spraying directly over your makeup unless you have dry skin.
Remember to pat the pigment on. Spraying it with Fix+ will increase the pigmentation dramatically and also help it to stay put on your lid.
Now you can take the same color you use on the lid or any highlight color to highlight your brows. I use this on a natural brush and blend it in just slightly with the transition and smoked out color. This is a Sedona Lace brush as well but instead of synthetic, it's a natural hair brush. Meaning, it absorbs more of the pigment and doesn't lay down as much color. That's why I love it for highlighting-it's not harsh and blends well.


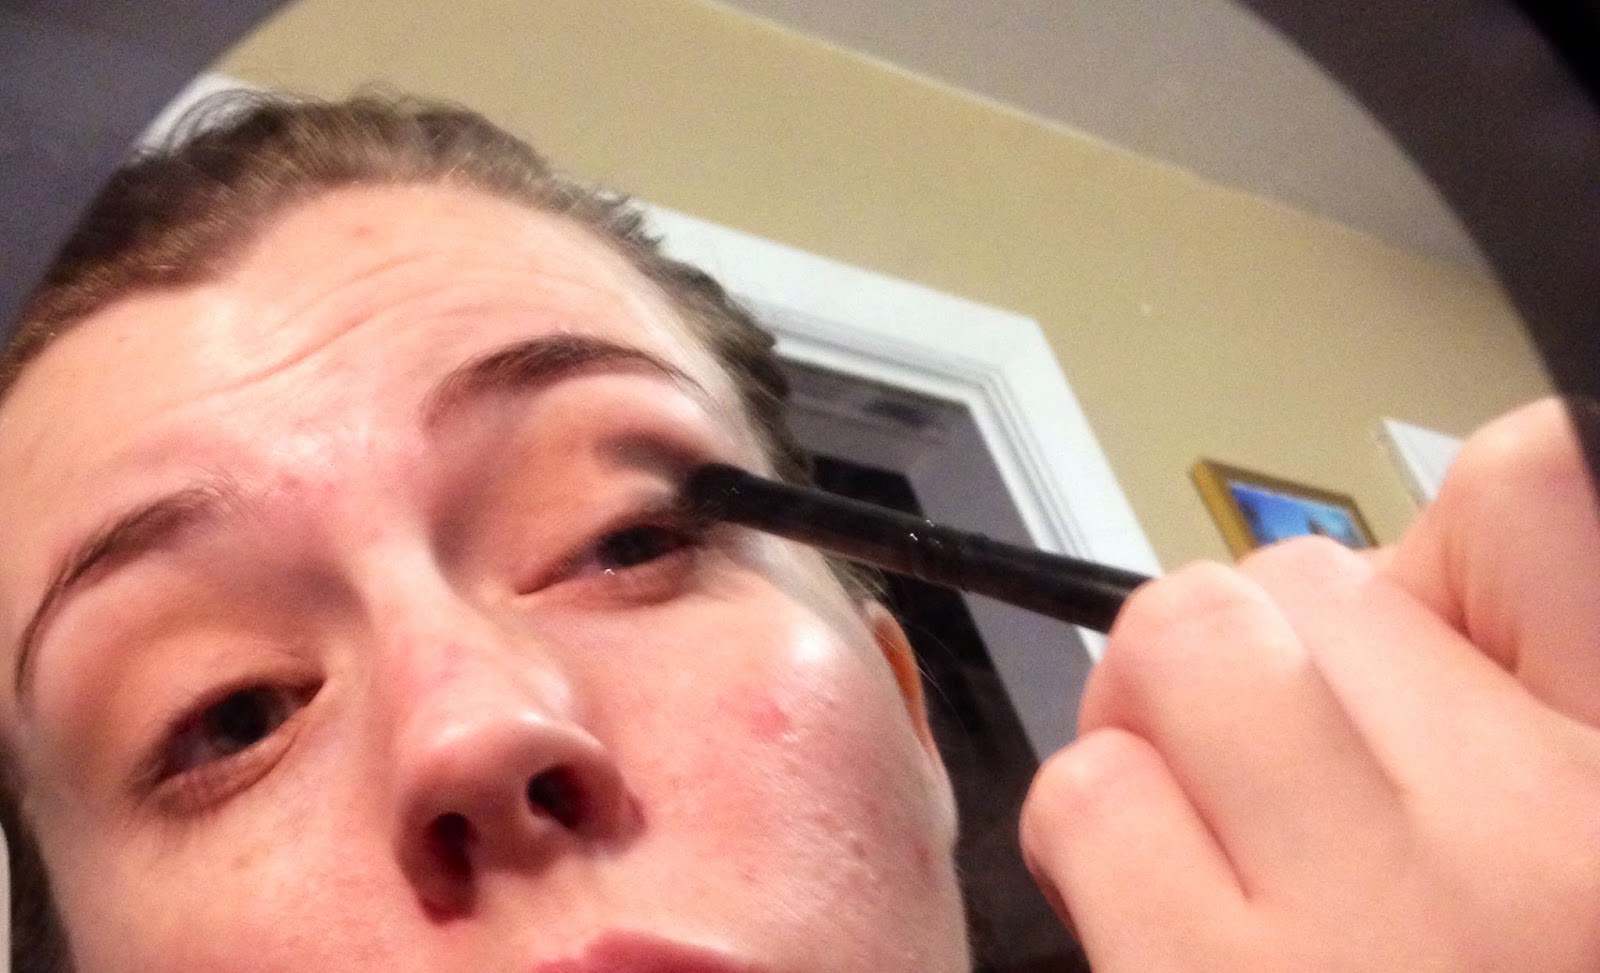
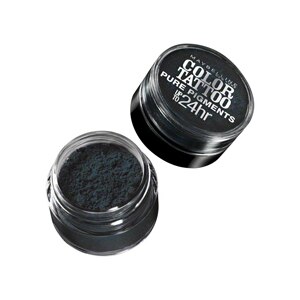
Next, I take a pencil brush (Any pencil brush is fine) and go in with a harsh black pigment. However, you can just go back in with the black you originally used if you'd like. No need to buy two. But for me, I like having a harsher black in small amounts over the black we already smoked out. You can use the original black shadow with Fix+ to create this effect as well, though. With that pencil brush, I spray it with Fix+ and go in with the black pigment (I used Color Tattoo by Maybelline) just in the outer "v" of my eye. Then blend! Here I show you one eye with the extra black pigment and one without. In my opinion it makes a favorable difference.

You can see that the eye on the left has more definition from applying just a little bit more of a harsh color to the outer "V" of the eye. However, either look is fine and it's totally up to personal preference.
The above picture also shows liner. I line my eyes with a gel liner. The reason I use gel instead of liquid here is because I want to smoke it out. Apply your gel liner one eye at a time so that you have time to go in (with a detail brush like the one by Real Techniques) and smoke/smudge it all out. I opt not to line my waterline here since the look is already closing in on my eye, but that's a personal preference. I felt that lining it with a white or nude color would break up the look too much, and lining with black on the waterline would close my eye up too much.

Curl your lashes and then go for mascara. I always mix my mascaras. First I do a coat of They're Real by Benefit, and then I go in with my trusty Telescopic Mascara in Black.

This picture is without liner or mascara on the bottom lashes. Don't neglect your bottom lash line or your smokey eye will look unfinished and awkward. 
Then finish the rest of your makeup and you're good to go! Don't forget to put mascara on your bottom lashes. With a smokey eye, you don't want to neglect the lower lash line or you'll look unfinished.

If you do go too far outside of your temples, this is your chance to take a makeup wipe and slide it across for a sharp line or even use a concealer brush and concealer to sharpen that up. You can also take this chance to clean up any fallout on your cheeks before putting on the rest of your makeup.

My suggestion, with an eye look as dramatic as this one, is that you go easy on the cheeks and lips and just let the eyes be the focal point. This will keep you from looking clownish. I just used a light hand with a pink blush and a quick swipe of lipstick using Saint Germaine by MAC. I opted not to use a gloss here because I feel like the muted matte look on lip looks well against something as dramatic as a black smokey eye. This look would also work well with a light hand in a peach blush and a nude lip.


And that, is that! Much easier than you'd think. And it took me 15 minutes (including the rest of my makeup) and that's WITH taking pictures. The awesome thing is that this is easy to recreate with color like green or purple, as a neutral with browns and golds, and to tone down for an every day look.

Obviously this look is very dramatic, but like I said it's so easy to create this similar look and tone it down for daytime, or even vamp it up with a darker lip and harsher lower lash line for a night out! Let me know if you're interested in seeing colored versions!


Let me know if you have any other questions about brushes or if anyone is interested in ways to create this look on a budget. There are some great drugstore options available, even as far as brushes go, so let me know!!

Have fun and tag me in your versions of this look on Instagram! #thesearchingproject and feel free to follow me @alyssalynnhall5. I love it when I see I've been tagged in a version of a look I've posted, whether it's makeup or fashion. I think it's so awesome the way that everyone can put their own twist on something as traditional as a smokey eye.

<3

Sunday, July 28, 2013

My Hair Illusion

So, let me tell you a story. There is this doll of a woman that I know. We go to the same church. She is always so nice to me, and even humors me by laughing at me when I make inappropriate comments during church lessons for the sole purpose of making the "stuffy" people feel uncomfortable. For this I will love her forever. She also always compliments me on my hair and how thick it is. For this, I laugh at her. You see, my hair is really fine and flat. But she doesn't believe me! I tell her, "It's an illusion, doll...." 

She has told me to do a blog post on this topic time and time again, and she has finally worn me thin. I just need to make it known that I am NOT a hair stylist (for this I have one woman--you know who you are), more often than not I am in desperate need of a trim and color, and I really have no idea at all what I'm doing. All I know is that this (kinda) works for me, and if you have hair like mine, maybe it'll work for you, too. So here goes.

First some background. My hair is fine (as I said before) but it's not necessarily thin as by the definition. I have a lot of it, but the actual strands aren't thick. What that means is that my ends tend to break off easily, but it's hard to moisturize without looking greasy because it isn't voluminous enough to mask it. How do you volumize and moisturize your hair at the same time without spending a fortune?! Very stressful, I know. 

So the first thing I do if I want to pretend I have big, thick, southern style hair that doesn't break is to use these three beauties. (You can buy it all at Walgreens. Well, at least I did. You can do whatever you want to...)

I use the CHI Silk Infusion on my wet hair, focusing on my ends mostly. This makes my split ends beg for mercy. I use whatever is left over on my hands and kind of just "go over" the sides of my hair. Then I use the Organix purple stuff (I get tired of typing out entire brand names. Plus it sound pretentious and that's annoying) on my roots. I don't even know if it works but it smells really good. Then, we blow dry. I do it upside down using a straight brush, a paddle brush or a round brush--whichever is closer. (See? I'm SO not a stylist.) Then after it's dry, I spray the CHI Iron Guard all over (but mostly on my ends) so that I don't fry my hair with my straighter. Am I supposed to use this before I blow dry? I dunno. Prolly. Like I said, not a stylist.

And then here I am. All three products used and just finished drying. Flat. Blah. Boring. Limp. Sad.


Next I go in with a teasing comb (mine has three different layers. I notice a huge difference when I use this one instead of the one with just two layers) and hairspray. Go at the crown of your head first, and spray. Hit it with a blow dryer to dry the hairspray and then tease it like a gazillion (I don't count, but probably 10) times and then do the same to the layer just under it. I do 2-3 layers. Then do the same thing on the sides. After that I pull apart and spread out all the crazy teased hair, hit it one more time with hairspray and let it sit for a second. I usually let it sit while I'm brushing my teeth and then I'm good to go afterward.

Next, I take the other comb-y thing (If a teasing comb and a bristle brush had a baby it would be this) and comb out a thin layer on top of my hot mess of a head so that I don't look like I've been electrocuted. 

Finally, I take my flat iron and clean up my ends so that they're all going in the right direction (that's all I really need since my hair is already straight) and then quickly go over the rest so that it looks smooth. If I have extra time, I'll even go over the teased portions. I figured this trick out (that is probably TERRIBLE for my hair) and realized that it helps the volume to stay and not look frizzy or tangled where I teased it. 


And after that (which takes me about 10 minutes from wet to done), here we are. Honestly, this is like the longest I spend on my hair, EVER. It's usually braided, in a bun or wavy (from sleeping in a braid or a bun). But when I decide not to be a lazy bum, viola.


Let me know what you think and share with me your hair care wisdom!

P.S. I know I need to get my roots done. Stop judging me.

-L

Thursday, July 25, 2013

Ipsy Vs. Birchbox: July Edition

Hey guys! Happy summertime!

I think this might be one of my very favorite monthly posts, and this month is no exception. I was given the suggestion to go a step further than just showing swatches, and to actually show you how I use the product, so I swallowed my pride and obliged. Also, I've added a couple of coupon codes for some of the products. Let me know if you like this!

Let's dig right in.

I'll start with Ipsy this time. The theme for Ipsy this month was "Beach Beauty".
First, I love the bag. I seriously immediately put it in our pool bag. It's a plastic, waterproof material that is perfect poolside.

The first product I pulled out was Sexy Hair Soy Renewal Beach Spray. This is a sea salt spray unlike any other. This spray is the best because it has a soy complex in it that keeps your hair from looking dry and frizzy, and also adds texture, as you can see in the pics. It came in a smaller than full size, but I know I will get dozens of uses out of it, and when it's out, I'll be keeping the bottle to refill for traveling.

Let me give you a little background on my hair. It is as straight as the day is long. All that I did this day was use dry shampoo and this spray, and this is what I got. You can use it on wet hair but I didn't do that this time. Even my hubby complimented me and asked me to do my hair like this more often. I will definitely repurchase this. In bulk.

And also, you can buy this at ulta.com, and here is a code for $5 off. You love me. You're welcome.
Code: 108723 
Valid through 08/15/2013

Next is this nail polish by Nailtini in the color Mai Tai. I love this! It's a great summer color-the perfect cross between orange and pink. It came in a full size bottle retailing at $13.00. (The entire subscription is just $10.00/month....are you following???!!!) I put it on and it lasted without chipping (with a topcoat) for a full week. And even then, I justified it for a few days after as chips were minimal. That's my kind of nail polish. Low maintenance!!
You can buy this on tinibeauty.com and this code will give you 30% off: hot4ipsy.

Then there is this eye shadow pallet by BH Cosmetics. It's the "California Collection" in the colors Hollywood (deep purple), San Francisco (neutral brown) and Malibu (gold). The pictures on the left are when I first put it on (using only a primer under it) and the pictures on the left are 8 hours later. It didn't crease, so I'm sold, baby.

Next was a tinted moisturizer with sunscreen or a tinted sunscreen that moisturizes. Take your pick. It's by Coola, which is probably this product's only redeeming trait. Honestly, I'm not a fan. It's an odd, very orange color. The sample size was incredibly small (maybe 2 uses). I love Coola, but this, not so much.
And last but not least, we have a lip crayon by POP Cosmedics in the color Fuscia Flirt (that middle one). I'm in love with this. I've worn it every single day since I got it. The size is great! It's a bit smaller than full size but it will last me a long time, as a little goes a long way.
Way to go this month, Ipsy. I'm a happy customer.

Next, let's go onto Birchbox!

The theme for Birchbox this month was Power Play. Frankly, I'm not really following the theme when it comes to the products, but I like them anyway.

First were these thick bobby pins by Birchbox. They come in a set of six for $5, and the sample came with two. Mine were the white and blue ones. I really like them. They hold my hair well, they're super sturdy, and they're cute. I might even buy more.

Next was this lipstick by ModelCo (a brand I really like) in the shade Peony. The line is called "Party Proof" with the idea that it'll last. It's a matte lipstick that is supposed to be more moisturizing than most matte lipsticks. I really liked it, but the color wasn't great. It's a "once in a while" color instead of an "every day, go-to" color. A lighter pink would have been more practical, for me anyway. The idea is great though. It does what it says it'll do and it doesn't transfer, yet it's not as big of a commitment as a lipstain.

Birchbox also sent over this hair oil by I.C.O.N India. The sample size was great and I liked it a lot! You can use it on dry hair, too. I've used it three times and I can definitely see the repair properties. It smells great, too! The full size is $40, so I probably won't buy it seeing as that's way too much to spend on hair oil, if you ask me. 
This next product is pretty nice. It's a foot lotion by a company called Pedi Cure which is hard for me to discuss considering I have a foot phobia. BUT, that being said, I used it and I really like it. It's like a pedicure in a bottle. Any callouses are pretty much gone after using it once (I used a lot and put socks on after overnight). The sample size was enough for at least four generous uses, and the full size is only $14. Okay, so bottom line is that I really recommend this but I just can't talk about it anymore because feet gross me out and I can't believe I actually used the word "callouses" and "foot" in the same paragraph. You'll like it, let's just not talk about it.
And lastly we have a Ceramidin (as in ceremides-a lipid already found in the skin) face cream by Dr. Jart. The sample they sent to me is the sensitive formula based on the profile you fill out when you sign up for Birchbox. I've used it the last 4 nights in a row. I use it at night and don't need any moisturizer the next day. It's an intense moisturizer but doesn't make your face look oily, shiny, greasy or anything else that would suck. It also kicks redness and helps even skin tone. The full size is $48, but I'm a splurger when it comes to skincare. I'll use it until the sample is gone (good size...I can probably get two weeks out of it) and then decide if I can't live without it. I wouldn't buy or need any other moisturizer or primer with this though, which justifies the cost. 

Nice work, my Birchbox friends.

After using the products in both subscriptions for about a week now, I have to say that this month, I would choose Birchbox over Ipsy. I loved my Ipsy products, but I've found myself having fun with the Ipsy products here and there but consistently reaching for the Birchbox treasures. Consistency is key!!

You can check out an Ipsy subscription here, and/or a Birchbox subscription here. Remember, both are just $10/month and each has their own points system/benefits towards free product.

And don't forget to let me know if you're into me loading you up with coupon codes. If so, I have plenty more!! Hit me with lots of feedback as I'm into doing either a Birchbox or Ipsy giveaway. I want to know which one ya'll like best.

-L